Configuration
Overview
An affordable line of IP gateways for Unified Group Communications
About

The AudioMate 360 IP audio gateway allows you to bring all your various communications networks into one unified group. Patch together iDEN subscribers with conventional VHF or UHF 2-way LMR repeaters. Pick up a telephone and immediately be heard across public address speakers on a large campus as well as on a property protection talk group on your trunked radio system.
Features
- Interfaces easily with repeaters, control stations, and remote control consoles
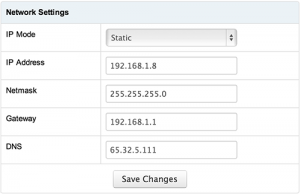
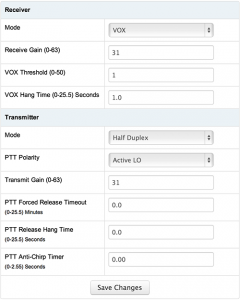
- Configure active high or low PTT and COS via web browser
- Configure Tx audio pre-emphasis and Rx audio de-emphasis via web browser
- Balanced E&M and single-ended audio interfaces
Specifications
Model | |
Model | AudioMate360r |
Physical Attributes | |
Dimensions | 1.75 in. x 3.6 in. x 5.2 in. (H x W x D) 4.5 cm x 9.2 cm x 13.2 cm (H x W x D) |
Weight | 0.8 Pounds 0.4 kg |
Electrical Specs | |
Input Voltage | 12 Volts D.C. Nominal 16 Volts D.C. Max 10 Volts D.C. Min |
Input Current | 350 mAmps Nominal |
Audio Interface | |
Line Input – Balanced | 0 dBm Nominal 10 dBm Max @600 Ohms (E & M port) |
Line Input – Single-Ended | 2.2 Volts peak – peak nominal 5 Volts peak – peak Max @ 10K Ohms |
Digital I/O | |
Outputs | PTT – 12 Volts @ 500 mAmp Max; Open Drain; User Selectable – active hi or low |
Inputs | COR – high > 3 Volts (18 Max); User Selectable – active hi or low |
Network | 10/100 BaseT Ethernet RJ-45 port |
Serial | USB-mini B diagnostic port |
Digital Audio | |
Current Codecs | G.711 µ-law 64kbps GSM 6.10 13kbps |
Environmental Tolerances | |
Operating Temperature | 0° to 50° C |
Storage Temperature) | -20° to 60° C |
Miscellaneous | |
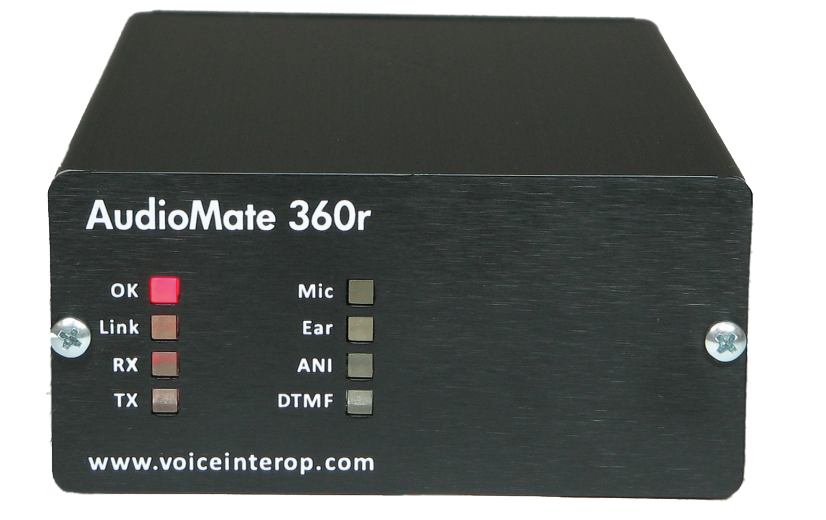
Indicator LEDs | Activity: OK, Link, Tx, Rx, Mic, Ear, ANI, DTMF |
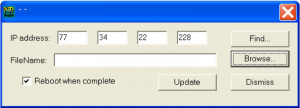
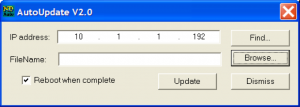
Features | Firmware upgrade over Ethernet Web browser configuration screens (no jumpers) Telnet diagnostic output USB diagnostic and base configuration utility |
Ports | 4-Wire E&M RJ-45 5-Pin inline for single-ended audio and digital I/O LAN RJ-45 12 Volt coaxial jack USB-mini for diagnostics |
Warranty | |
Parts | 1 year limited |
Labor | 1 year limited |
Network Settings

IP Mode
Either Static or DHCP
IP Address (Static Only)
The desired static IP address for the device.
Netmask (Static Only)
The network subnet mask for the LAN segment this device is physically connected to.
Gateway (Static Only)
The default gateway for the network.
DNS (Static Only)
If set to 0.0.0.0, the DNS server information provided by your default gateway will be used. Otherwise, the specified address will be used for DNS lookups.
Radio Settings

Receiver
Mode
- VOX
- Voice Operated eXchange detects the presence of voice to signal whether or not audio is being received from the radio. When using VOX it is possible that some clipping at the beginning and end of the transmission can be clipped. VOX has both a sensitivity level as well as a hang timer to detect brief pauses in transmission. When using VOX it is entirely possible that another endpoint is transmitting, however, if the VOX threshold is not met, the channel may never be detected as keyed.
- COS (also known as COR)
- Carrier Operator Squelch is used for mobile radios. When a radio receives a transmission it will send a signal to the AM360 box that tells it the radio is currently keyed. COS is far superior to VOX and is also the preferred mode of operation for devices connected to the ReadyOp platform.
Receive Gain (0-63)
The amount of volume/gain by which incoming audio traffic is increased.
VOX Threshold [VOX Only]
The VOX sensitivity level, the higher the setting, the more audio volume is required to signal the AM360 that the radio is receiving a transmission. The lower the setting the more sensitive the AM360 receiver is to incoming transmissions. If set to 0, the AM360 will be locked in a receiving mode, regardless of whether or not an actual transmission is being received. The default, and recommended setting is 1.
VOX Hang Time (0-25.5 Seconds) [VOX Only]
The amount of time the AM360 should stay in a receiving keyed state after the VOX Threshold has been reached. The recommended setting is a value between .50 and 1 second. If set lower, it’s possible that during a transmission when brief pauses in communication/voice traffic are received, the AM360 will switch between a receiving and idle state.
COS Polarity [COS Only]
Either HI or LO. This is the type of signal the AM360 should expect to receive when the radio is keyed in a receive state. This is also a configurable setting on most mobile/portable end units.
Smart Silence Detection [COS Only]
When set to ON, COS will be used to signal the ReadyOp platform that the radio is keyed. However, VOX will also be employed to regulate network traffic. If voice/audio traffic is not detected, audio frames will not be transmitted to the network. The recommended setting is ON for increased bandwidth savings.
Transmitter
Mode
Half Duplex or Full Duplex. Currently the only supported mode for the ReadyOp platform is Half Duplex.
PTT Polairty
Either HI or LO. This is the type of signal the AM360 should sent to signal the radio that it should be keyed in the PTT state.
Transmit Gain (0-63)
The amount of volume/gain that should be applied to audio before it is transmitted through the radio.
PTT Forced Release Timeout (0-25.5 Minutes)
The maximum amount of time the radio is allowed to transmit before the squelch timer will de-key the radio and stop transmitting.
PTT Release Hang Time (0-25.5 Seconds)
The amount of time the AM360 should keep the radio keyed in the PTT state after the transmission has ended.
PTT Anti-Chirp Timer (0-2.55 Seconds)
The amount of time audio should be held/buffered before sending to the radio for transmission. This is used to prevent the first part of a transmission from being cut off on radio systems that take a moment to receive a keyed (PTT) audible/signal.
Device Settings

Device Name
Similar to a hostname, this is the is the name for which this device will appear as when connected to your network.
Password & Confirm Password
The password that will be required to login to the device’s administration/configuration page. The default is “password”.
Connection Settings

Codec
G.711 μ-law (64kbps) or GSM 6.10 (13kbps)
Pre-buffering
Packet pre-buffering controls how many incoming audio frames are buffered from the network before being sent to the AM360’s hardware audio output channel. The default value is 4.
Remote Host
This should point to the principal ReadyOp communications server
Remote Port
This is the receiving port on the ReadyOp communications server, the default for host and local ReadyOp installations is 1935
Container
For hosted client’s this should be the url prefix for your assigned account ([container].readyop.com). For local installations this is usually the name of the company’s domain name.
Agency
The agency number for which this radio should connect to.
Identifier
Similar to a username, this is used to authenticate the radio against your agency. This is defined by the system administrator who created the radio in the ReadyOp Dashboard. For more information, see Creating a Radio.
Key
Similar to a password, this is also used to authenticate the radio against your agency. This is defined by the system administrator who created the radio in the ReadyOp Dashboard. For more information, see Creating a Radio.
Firmware Update
Internet Update (TCP)
TcpUpdate is a utility similar to AutoUpdate, but uses TCP instead of UDP to download a new application image to your AM360 device. The most common reason to use TcpUpdate is if you need to update a AM360 device behind a firewall or NAT router.
TcpUpdate is commonly used for:
- Updating the application over the Internet, or when your AM360 device is behind a firewall or NAT router. Requires access to port 20034.
TcpUpdate can be started from:
- By launching the TcpUpdate GUI application.
- From a command line.

TcpUpdate Cannot Reprogram Your AM360 Device
If TcpUpdate cannot reprogram or connect to your device:
- A firewall on your PC may blocking network port number 20034. Try temporarily disabling your firewall to see if this is the cause.
- The AM360 device is behind a firewall or NAT router and is blocking network port number 20034. You may need to add a rule to the firewall, port forwarding to the NAT router, or both.
- The application in your device is not running. This can happen if you download an application that is crashing. Network communication is only possible if you have a running application. To recover from this situation use MTTTY and download a working application through the serial port using the “FLA” command.
Using TcpUpdate
- Start TcpUpdate.
- Enter the IP address of your AM360 device. Note that the “Find” feature will only work for devices on the same LAN.
- Click on the “Browse” button and select the application image, which must end in “_APP .s19”.
- Verify the “Reboot when complete” checkbox is checked.
- Click on the “Update” button to execute the update.
Download
The TcpUpdate application can be downloaded here: TcpUpdate.exe
LAN Update (UDP)
AutoUpdate is used to download a new application image to your AM360 device flash memory over a network connection using UDP. In order for AutoUpdate to work the PC and AM360 device must be on the same local area network, and the AM360 device must have a valid IP address and mask so that it can communicate with the PC.
AutoUpdate is commonly used for:
- Updating the application over a LAN network.
AutoUpdate can be started from:
- By launching the AutoUpdate GUI application.
- From a command line.

Running in Auto Mode without User Intervention
When run with command line options you can specify a number of options, including the –A option to run in “automatic” mode in which it will not ask for user input. This is useful for batch programming of devices in a production environment.
Command line options:
AutoUpdate -I<ipaddr> -F<filename> -R -A
Example: AutoUpdate –I10.1.1.2 –FMyProgram_App.s19 –R –A
This example will program the device at 10.1.1.2 with the MyProgram_APP.s19 image, Reboot the device when done, and run in Auto mode in which it does not display the dialog box and ask for user input.
Parameters
-I<ipaddr> IP address of device to update.
-F<filename> The _APP.s19 file containing the application image to use.
-R Tells the device to reboot after programming.
-A Execute without displaying dialog box or user intervention.
AutoUpdate Cannot Locate Your AM360 Device
If AutoUpdate does not display your device it is for one of the following reasons:
- A firewall on your PC is blocking network port number 20034. Try temporarily disabling your firewall to see if this is the cause.
- The application in your device is not running. This can happen if you download an application that is crashing. Network communication is only possible if you have a running application. To recover from this situation use MTTTY and download a working application through the serial port using the “FLA” command.
- You are trying to talk to a device on the other side of a router. The PC and AM360 device must be on the same LAN.
Using AutoUpdate
- Start AutoUpdate.
- Click on the “Find” button and select your AM360 device.
- Click on the “Browse” button and select the application image, which must end in “_APP .s19”.
- Verify the “Reboot when complete” checkbox is checked.
- Click on the “Update” button to execute the update.
Download
The AutoUpdate application can be downloaded here: AutoUpdate.exe
Serial Update
Network communication with your AM360 device requires a functioning network enabled application to be running on the device. The three most likely conditions related to application programming that can cause network communications to fail are:
If you download a bad application that is crashes the system, which can be common during software development.
- Downloading an application that does not enable the network stack.
- Removing power while updating flash memory with a new application.
When an AM360 device is powered-on or reset, the Boot Monitor will verify the application checksum, decompresses it to SDRAM, verifies the checksum, then jump to the application code and begin execution. At that point your application has 100% control over the hardware.
If you lose network communication for any of these reasons the recovery method is to download a working network application using the debug serial port (default is uart0) and a serial terminal such as the AM360 MTTTY. The boot monitor is a very small program and does not have network capability. The application file must be of the type _APP.s19.
Run MTTTY on a PC
Run the Multi-Threaded TTY serial terminal program on your Windows PC and select the serial communications port. The default serial settings of the boot monitor are: 115,200 baud, 8 data bits, no parity, and 1 stop bit. Click on the “Connect” button in MTTTY to enable serial communications.
Enter the AM360 Boot Monitor
- Cycle power (i.e. remove and reapply power) to your AM360 device. If using a USB connection you may need to use the reset button instead, but a power cycle is the most reliable method. You will see a “Waiting 2sec to start ‘A’ to abort” message in the MTTTY window.
- Type an uppercase ‘A’ before the time expires to enter the Boot Monitor. You will see the AM360 prompt (i.e. NB>) in the MTTTY window.
- Type the command “FLA” (FLA stands for Flash Application) and then press the Enter key on your keyboard.
- Begin the download in MTTTY by selecting the Transfer –> Send option from the Transfer menu, or by pressing the F5 key on your keyboard.
- A Send File window will appear. Navigate to the location of your known good _APP.s19 file and click on Open or Select button. As your download progresses, “****” characters will appear in the MTTTY window, and the progress bar on the lower left hand side of the window will move towards the right.
- The Boot Monitor will automatically reprogram the application area of the flash and restart your AM360 device after your download is completed.
Download
The MTTTY application can be downloaded here: MTTTY.EXE